


EASY IN WALL & IN CEILING SPEAKER INSTALLATION
This article is designed to help you build confidence in your upcoming in-wall or in-ceiling system install. It’ll touch on the major steps in the process. And if you need more detailed info, there’s links to deeper articles.
Rest assured: This install process is not very difficult.
You or someone who can help you should have a little handiness, but you don’t need to be a tradesperson. You’ll also need a few tools that are listed below.
If you decide you don’t want to tackle the install yourself, get in touch with us here and we’ll refer a friendly installer.In this article I’m going to dive right into the install process and go over the basic steps.
If you need guidance on whether or not you’ll be able to use in-wall or in-ceiling speakers in the first place… or guidance on how to plan the install project… read Planning To Install In-Wall Or In-Ceiling Speakers.
CONTENTS
- Tools Needed To Install In-Wall Or In-Ceiling Speakers
- Trace And Cut Your Speaker Cavities
- Running Your Speaker Cables
- Hook It Up And Test It
A List Of All Tools Needed
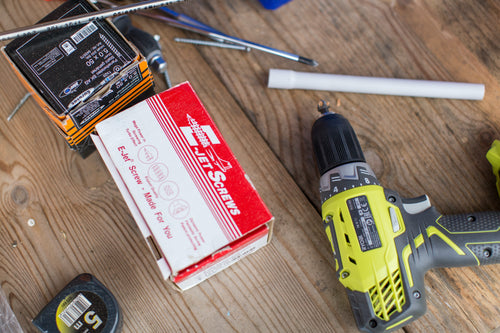
Absolutely necessary tools:
- Utility knife (or jab saw / drywall saw)
- Level (fluid or laser will work)
- Stud finder (or strong, rare-earth magnet)
- Phillips screwdriver
- Pencil
- Measuring tape
- Fish tape / Electrical snake
Helpful tools:
- Wire strippers
- Masking tape
- Drill and bits
- Paddle drill bits (for drilling holes to run cables through framing)
- Shop vac
Trace And Cut Your Speaker Cavities

When everything is planned out, it’s time to cut the holes for your speakers.
You MUST use the templates included with each Jensen product to cut out the holes.
Make sure wherever you cut the template is at least 25 mm away from any obstructions in the wall. If you marked them using a stud finder, you’ll be able to judge this.
First, mark the cut lines with a pencil. Using a level here is helpful to get a tidy, professional look.
If the plasterboard isn’t too thick, a utility knife may be all you need to get the hole cut. Score the board carefully and repeat, until you break through all around.
If the plasterboard IS thick, you might need a jab saw / drywall saw. You’ll start by drilling holes in opposite corners (13 mm or however wide your saw blade is). That way you can get the saw cut started.
Don’t worry if the edges are a bit rough. The edges of the speaker will cover them.
Once your opening is present, make sure you clear all insulation in the area your speaker is going. It’s better to keep insulation from directly touching the back of the speaker drivers and the electrical components.
Running Your Speaker Cables
For in-wall speakers, you will need to run the cables down or up the wall then across to your amp area.
For in-ceiling speakers, you will run the cables along the ceiling and down to your amp.
For your amplifier space, it’s best to use a wall plate to dress up wherever the cables come out. Make sure it’s at the same height from the floor as any electrical outlets in your home (for a professional look).
See what kind of access you have above or below the room.
Basement and/or attic access makes running cables easier. You’ll run from the speaker spot to the basement or attic, then over to the amp’s location. Then back up (or down) to the wall plate.
If you have no access above or below the room, you might have to run the cables inside skirting board or cornice.
You may also have to cut and patch plasterboard so you can drill holes in the timber framing or create notches to get around it. There are a few tricks to doing this with minimal repair.
How to cut a temporary “window” in your plasterboard. (Make sure the window is big enough so you can drill through the frame. You can use a utility knife instead of a multitool also — you just have to keep scoring the cut until it goes through.)
Using a fish tape, electrical snake, electrician’s rod, or whatever you want to call it… is a HUGE help.
Bending the end at 180 degrees helps prevent it from getting caught. Adding another slight bend 10 cm or so back will also help get around obstacles.
You’ll push it from one accessible spot through to another one.
Then, once it’s there, you attach and sticky tape the end of your speaker cables to the fish tape / rod. Pull it back through carefully.
Be sure to label the ends that you’re plugging into the amp.
Tip: If you measure the distance it needs to go and mark it with tape, you will know if it went off course along the way. When you’re pushing through insulation, this can happen.
Tip:Be sure to leave 500 mm extra cabling for ceiling speakers so it’s easier to hook them up from the ladder.
For more detail on different ways to run cables and how to do it, go to The Complete Guide To Running Cables For In Ceiling And In Wall Speakers.
Hook It Up And Test It

Once your speaker cables are hanging out of the speaker holes and the wall plate, it’s time to hook it up and jam.
Attach speaker cables to in-wall or in-ceiling speakers using the ‘spring’ terminals on the backs. You need the ends of the cables to be bare wire, twisted to keep it together. Press the terminal, insert the wire, and release to lock it in.

Make sure you’re going positive-positive and negative-negative, too.

The speaker cabling will be pairs. Either two different colors, or one of the two will have a marking (could be a line, could be text). This will help you make sure both ends are hooked up the same.
If you hook up green to positive on one side, do it on the other as well.
If you hook up the ‘text marked’ wire to positive on one side, then do so on the other as well.
Once the cables are all connected, secure each speaker to the wall or ceiling by inserting it and using a screwdriver to tighten the clamps. Be careful not to over-tighten! Get them ‘snug’ so the speaker doesn’t budge and you’re set.
Head over to your amp and hook that up as well.Once everything is in place, fire up your amplifier / receiver.
It’s time for a test drive.
Start at a low volume and check that each speaker is playing. If you’re using an AV receiver, go to the settings and find the speaker settings. Play a test tone to each speaker and check that it’s all hooked up right.
Now that all is working, you might have to repair the plasterboard cuts you had to make to run the cables. This video will help you learn how to do this.

Here’s a list of other helpful resources in planning and installing an in-wall or in-ceiling system:
Where do I place my rear speakers?
Where do I place my Front Speakers?
Dolby placement guides (coming soon)
The Complete Guide To Running Cables In Your Home For In-Wall And In-Ceiling Speakers
How much speaker wire do I need? (and what type)
How many speakers do I need for music