THE COMPLETE GUIDE TO RUNNING CABLES IN YOUR HOME FOR IN-CEILING AND IN-WALL SPEAKERS

This article will give you some details on how you can run speaker cables for your in-wall or in-ceiling speakers.
There are a few different ways to do it, so most homes should be covered.
If you are building from scratch, renovating, or simply have access to behind the plasterboard — you don’t need to read this.
Contents
- Will you be able to run speaker cables?
- What’s behind your walls and ceilings?
- Running cables up or down the wall
- Attic or crawlspace method
- Skirting board method
Will you be able to run speaker cables?
There are some rare cases where it’s not possible to run speaker cables for in-built speakers.
You have to be able to get a run of speaker wire FROM each speaker location TO wherever the electronics are going. And you want them to be hidden, for obvious reasons.
If the walls and ceilings are plasterboard, they can be cut and patched.
You will be able to run the cables if this is the case.
So where are the non-plasterboard walls? Rendered brick walls are common and they make it harder to run cables. You’ll be able to run the cables for in-ceiling speakers if you have cornice or skirting to use — but make sure this is the case.
Worst case scenario you might have to add trim to a room to hide the cables.
What’s behind your walls and ceilings?
Before you go cutting and poking around you want to KNOW what’s behind those walls and ceilings.
This will prepare you to problem solve and get the job done.It’s almost always doable, and usually pretty easy.
Framed walls
If you’re using in-wall OR in-ceiling speakers, you’ll probably need to run cabling in the walls. That’s how you’ll get to the electronics.
Check out this diagram to get a feel for how walls are framed.
Take note of how windows have lintels above them, and walls are 90mm or 70mm deep with 35mm or 45mm thick timbers.
Also note that studs are at 450mm or 650mm centres. Once you work out which it is, it should be the same for the whole house.You’re going to have to run around (or through) these timbers.
See below for how to do this.
Framed ceilings
Ceilings are a bit different in that, they usually only have “joists.”
These are timbers that run the full length (or width) of the room. Check out this picture to see what I mean. The “ceiling joists” are running parallel with a uniform spacing.
In the room you’re putting in-ceiling speakers, you want to know which way the joists are running.
They’ll either be running TOWARDS the wall where your electronics will be… Or LATERALLY to a ‘side’ wall.
If you can’t access an attic space above the speakers, we hope they’re running TOWARDS. But if not, you’ll still be able to do the job (using the ‘cornice’ method below).
Running cables up or down your walls
All installation methods will require you to do this.
That’s because you will have to get the speaker cables to the electronics somehow. Regardless of if you are running ceiling speakers (you have to run DOWN the wall once you get there). Or wall speakers (you may need to run UP the wall in this case).
Use A Wall Plate!
Wherever your speaker cables are coming out of the wall and connecting to your electronics…
It’s tidy and professional to use a wall plate.
There are ones with individual speaker terminals and there are open ones where the cables can just drape out.
Just make sure you label which speaker goes to each terminal (or cable). And install your wall plate at the same height as the power outlets in the room.
Before you do anything (and after you know WHERE you want your speakers to go) you want to know what’s behind the wall.
In the last section we got familiar with WHAT is behind the wall. Now we need to take action on that.
AC mains power and plumbing
You need to know where the framing is and to be mindful of AC power lines and pipes.
You MIGHT be able to infer where AC powerlines will be based on the power outlets in the room are. They usually run up or down the adjacent stud. They can run across the wall too. There are some images here, here, and here.
The point is, don’t cut holes where framing already is and don’t stab tools through the wall willy-nilly because there could be utilities behind.
Use a stud finder to located framing, or use a powerful rare-earth magnet to find plasterboard screws (which are in the framing). This will help show where you have empty space in the wall.
Then open the wall up carefully so you can look inside for utilities.
How Stud Finders Work
Stud finders use electrostatic field or radio waves to detect changes in density. They come in “edge” type and “centre” type. Unfortunately they usually don’t say (maybe in the manual). The cheaper ones will be edge-type for sure.
Edge finders can be out by 25 mm, so you need to find both “edges” then mark the centre. Approach the object from one side until the finder lights up. Mark it. Then again from the other side. Mark it. Find the centre of those two and mark that — that should be the centre of the frame. (Remember they’re 70mm or 90mm thick.)
Breaching the wall and running cable
NOTE: BE PREPARED TO SHUT OFF THE ELECTRICITY WHEREVER YOU WILL BE DRILLING!
You will have a hole in place behind your electronics (the wall plate).
To get your cables there they’re either coming from the ceiling, the eaves outside, the basement, the skirting, or the cornice. This is where some opening is feeding into the wall.
Besides utilities, you may need to deal with noggings (up and down runs) or studs (side to side runs). The green line in this image below will give you an idea on what I mean:

You can use a paddle bit to drill through the framing so your cables can get through.
The key is to cut open a “window” in the plasterboard so you can access the framing, then drill the hole, feed the cable, and patch the hole.
When you cut the hole be sure to use a “pumpkin cut” where you angle the utility knife or jab saw INWARD. Leave one edge uncut so the paper acts like a hinge. See this video (at 2:55) and this video for examples.
If you have to drill through a stud, your hole diameter can be no more than 40% of the width of the frame. So 28mm for a 70mm stud, and 36mm for a 90mm stud.
Assuming you have a clear path in the wall, you can run the cabling using a fish tape or electrical snake.
Bend one end at 180 degrees so it can find its way through insulation or mild obstacles. Get it to the other side, tape your speaker cable to it, and pull it back through.
If you’re struggling to get through insulation, you can attach a metal chain at the end of the fish tape and use a powerful rare-earth magnet to stick to it on the other side of the wall.
(Make sure to use 10-15% extra speaker cabling just in case, and 500mm extra for in-ceiling speakers for the hookup. Also: LABEL WIRES BEFORE PULLING THEM THROUGH!)
Attic or crawlspace method
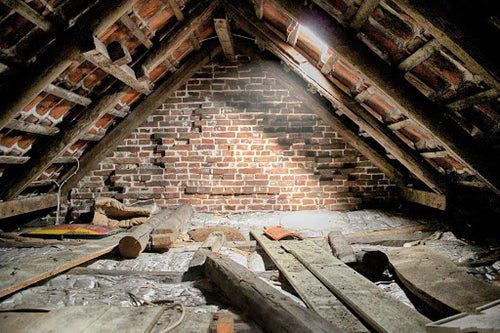
This is the easiest method for running cables.
If you can get into an attic space above your in-ceiling speakers, you can easily run the cables over to the wall (or eaves).
Same goes for the crawlspace or basement.
You will probably have to drill a hole (no bigger than 40% of the width of the framing) through the bottom or top plate. Be mindful of where mains and plumbing might be.
Use a reference point, like a corner of the room, or have a buddy listening to where you’re drilling. This will help you work out exactly where, along the wall, you’re coming through the top or bottom plate.
Once you get your cabling from each speaker over to the wall adjacent to your electronics, you can follow the wall running advice from the last section.
Skirting board method

If you have no access to the attic or crawlspace, and you need to run wires further than just one front wall…
Take advantage of trim.
This first method requires you to either remove existing skirting board and run cabling behind it, or add skirting board.
With in-wall speakers you’ll run cabling from the speaker location downward to the floor. Drill a hole in the wall behind where the skirting board goes. And run the cabling along that corner. When you reach wherever the wall plate is going you drill another hole in the wall behind the skirting and run the cable up to the wall plate.
You may need to notch the back of the skirting (here’s an example).
If you have to get around a door too, you may need to remove the door trim and stick the cables in the vacancy beneath it. (Like this.)
Cornice method
If you want to take advantage of trim but you’re using in-ceiling speakers, you can use the cornice board instead. (See here for example.)
This is helpful when the joists in the ceiling are running from your speaker to a side wall, instead of towards the wall with your electronics.
You’ll run the cables from the speaker laterally to the wall. Then drill a hole underneath the cornice to bring it out. Run it along the corner until you’re above wherever your electronics are. And drill back into the wall.
Then run the cables down the wall using the guidelines from the previous section.
Hopefully you found exactly what you needed to get your speaker cables run.
If you’re running into trouble or decide you don’t want to tackle the install yourself, get in touch with us here and we can recommend a helpful installer to get the job done for you!